We were so excited when Facebook started allowing gifs to be posted as either comments or pictures. That excitement soon turned to disappointment, as the upload process was rather complicated and rife with errors. This guide explains how you can upload gifs that play automatically and avoid errors like posting static images or link pages instead.
What are gifs anyway?
You probably know what gifs are, if you reached this article via a Google search but we thought it would be good to provide some background information on what they are. GIF or Graphics Interchange Format, is a digital image format like JPG and PNG. The popularity of gifs stems forom the fact that they can support some simple animations.The way animated gifs work is by holding together multiple images which appear one after another, creating a video effect. There are some limitations when it comes to gifs. For one, they only support 256 colors, so no HD gifs. They also don't support sound, which explains why so many of them come with subs.
Why bother with uploading gifs in Facebook?
You might be wondering why bother with gifs at all, if they're so much harder to upload than a normal picture. Well, the main reason why we think you should share gifs on Facebook is because they help to maintain your audience's interest longer than a picture.
Gifs give you an opportunity to engage with your audience, adding a punchline or a laugh, and capturing that positive emotional response from your audience. If a picture paints a thousand words, then a gif is probably worth a million.
Difficulties when posting a gif on Facebook
If you reached this page via Google search, then you're probably frustrated with your gif posts not displaying correctly on Facebook. We've been there and frankly, a lot of the posts out there don't provide an accurate solution.
First off, let us start by saying that you can't simply upload a gif like you would do an ordinary JPEG or PNG photo. If you were to do so, you'd get a static image instead of an auto-playing gif. What you need to do instead, is upload your gif to an image hosting site or file hosting site and then paste the hosted gif's URL into your "create a post" box.
That sounds simple enough, doesn't it? The problem we faced, however, was that not all image hosting sites were compatible with posting gifs on Facebook. Giphy, Tumblr, Imgur and even Blogspot didn't work too well for us. There were times when the gifs auto-played, but more often than not, it resulted in a static image being posted instead. The only gif hosting site which we found reliable for posting gifs on Facebook was Gfycat.
How to properly post gif to Facebook
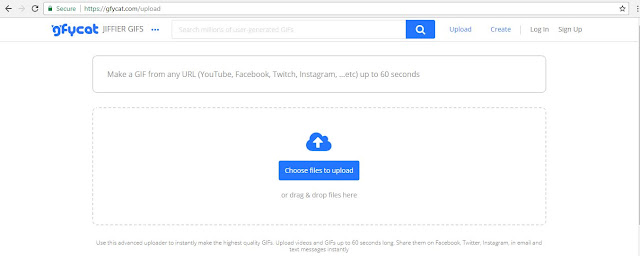
1. Upload the gif you'd like to post on Facebook to Gfycat.
Gfycat allows you to upload videos and gifs up to 60 seconds long, which is plenty of time in our opinion. Wait for the upload to complete - it usually takes a few minutes, depending on your Internet connection.
2. Click on "See More Details" and scroll to the bottom of the new page that opens
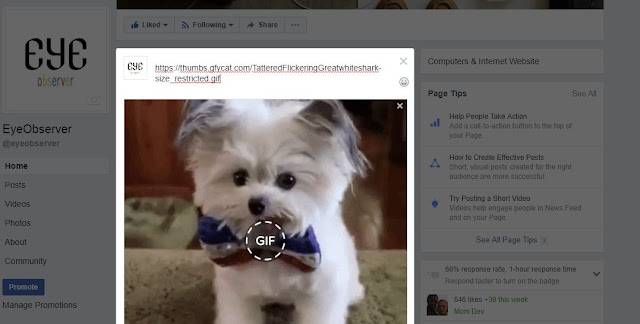
3. Copy the GIF URL and paste it in Facebook's "Create a Post" box
When you paste the hosted gif's URL in Facebook's box, you will know that you've done it correctly when you see that the fetched preview has a "gif" circle on it, like in the picture below.
4. Delete the gif URL and add in the desired text for the post.
There is no need to keep the URL of the gif once Facebook has fetched the preview successfully.
Final Thoughts
If you've had difficulties posting gifs on Facebook in the past, do give the above steps a go. Now that we've got posting gifs figured out, we're doing a lot more of it and hope to collect stats on the engagement which we will share with you in a bit. Thanks for reading as always!


Comments
Post a Comment